What you need whenever you’re reading your Bible, or really, any book, is a bookmark! An efficient bookmark not only helps you to keep track of the last page you were on, but helps you keep your place while you read.
This is how to make a Bible bookmark that has a page flap and an adjustable arrow to keep your place while reading. It’s a very fun, simple, and aesthetic DIY project to do in a short amount of time!
Tag us on Instagram @modchristlife and show off your creations!
Materials Needed
Cardstock or paper of a similar thickness. Printer paper is thin but it can also work.
A ruler to provide you with a straight edge and to measure the dimensions of the bookmark before cutting it out.
A graphite pencil to mark the guidelines before cutting out the bookmark.
An exacto-blade. Scissors will not work.
Colored pencils and/or markers to customize the bookmark.
Instructions
1. MEASURING THE DIMENSIONS OF THE BOOKMARK
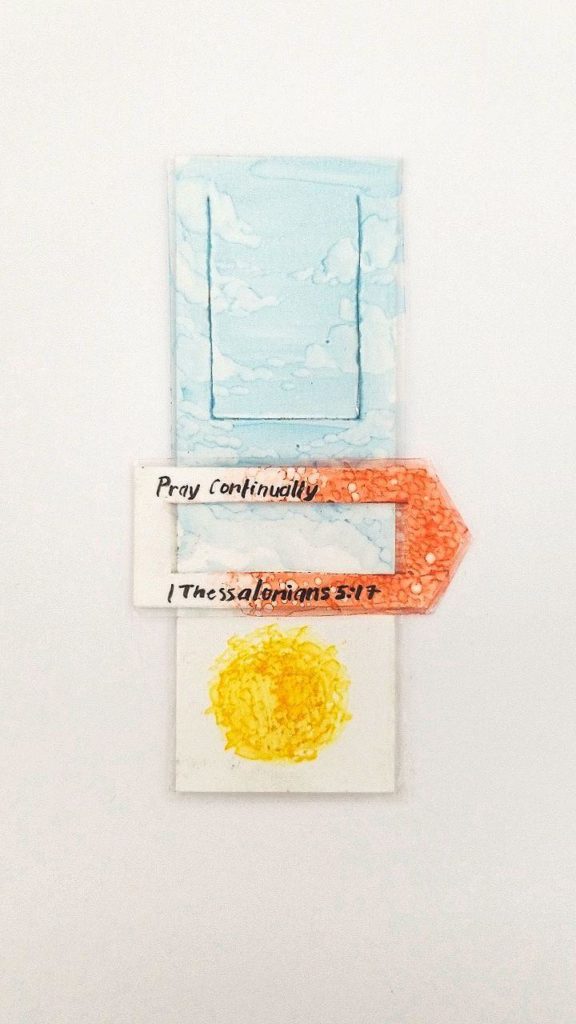
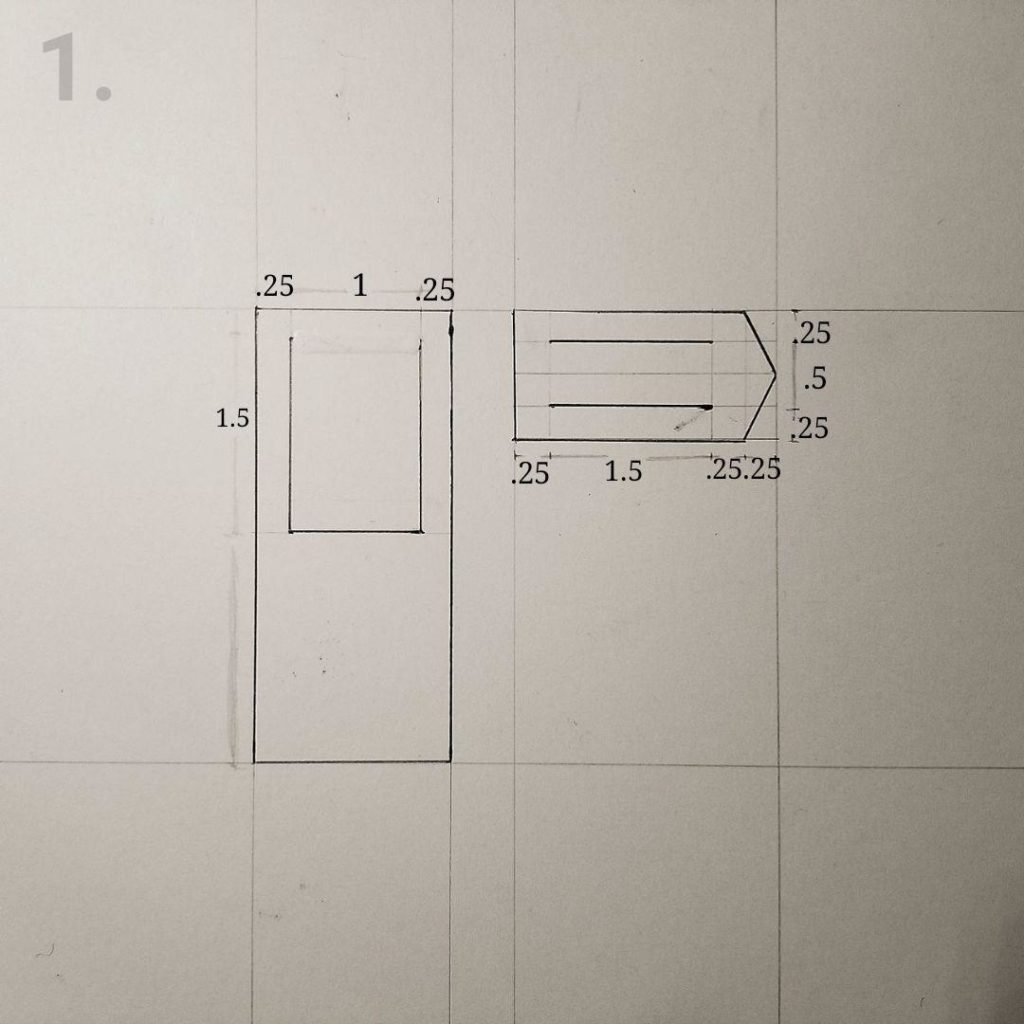
First, measure your Bible to calculate an appropriate length for the bookmark. The bookmark should be at least half of the length of one page of your bible, with an added 1/4 inch at the top for the page flap that will grip the pages of your bible. The width of the bookmark will be an inch and a half.
Draw these dimensions on your cardstock or paper with a graphite pencil.
The page flap will be an inch and a half long and an inch wide. Mark two vertical lines 1/4 inch away from the left and right edges of the bookmark. They should start 1/4 inch from the top of the bookmark. Mark another line that connects the bottom ends of the two vertical lines you marked earlier. The guidelines you have just marked should make an open square on the front of your bookmark. Refer to the diagram for clarity.
The sliding arrow is detachable, so it’s guidelines should be drawn off to the side.
The width of the sliding arrow should be the width of the bookmark, with an additional 1/4 inch on either side for structure and another 1/4 inch on one of the sides for the point of the arrow. The arrow is 2 and 1/4 inch wide and 1 inch long. Cut the corners from the side that has the extra 1/4 inch to make the point of the arrow. Refer to the diagram for clarity.
To enable the sliding action of the arrow, mark two horizontal lines on top of each other and half an inch apart. Make them 1/4 inch from the edge that is opposite of the arrow’s point.
Mark the dimensions of the arrow with a graphite pencil.
Do not make any interior cuts until after you customize the bookmark. The page flap and the vertical slits will be cut later.
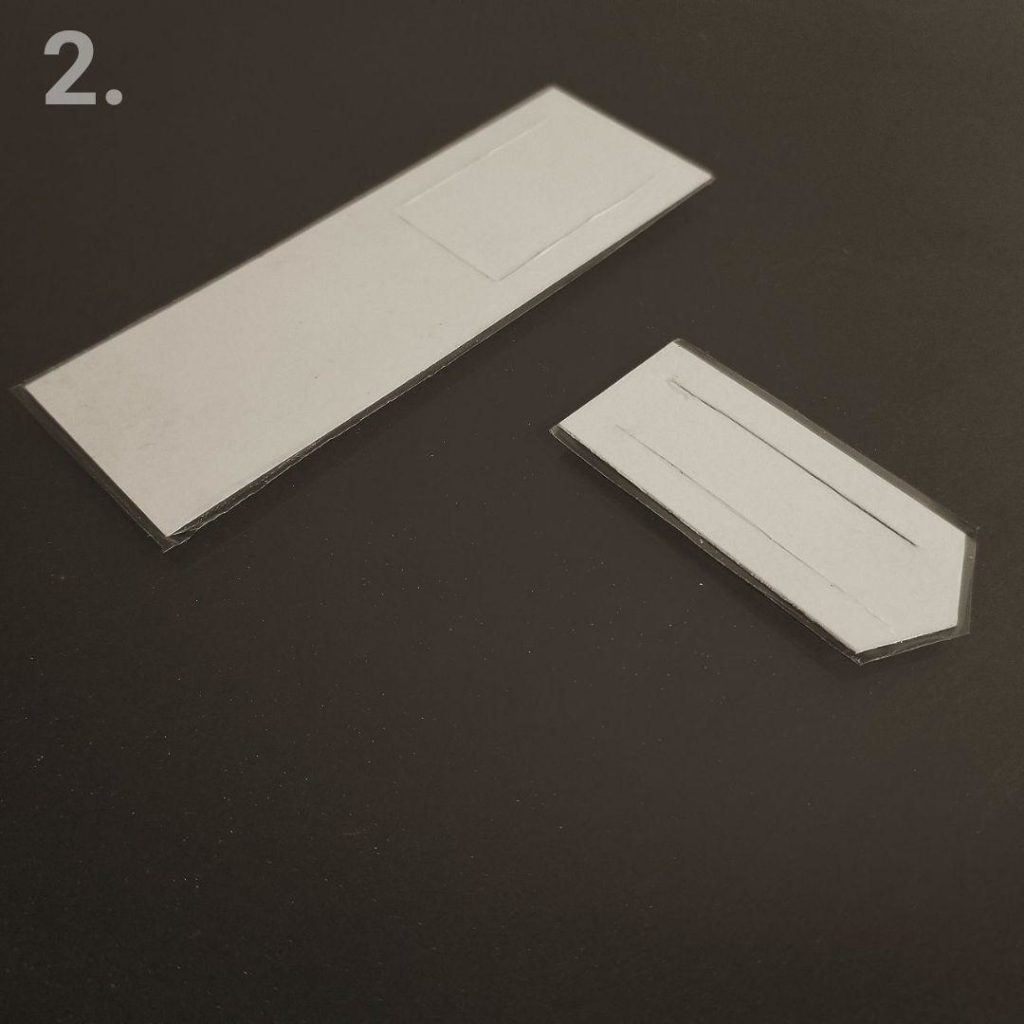
2. CUT OUT THE BOOKMARK
With the dimensions set and the guidelines drawn, you are ready to cut out the bookmark and the arrow.
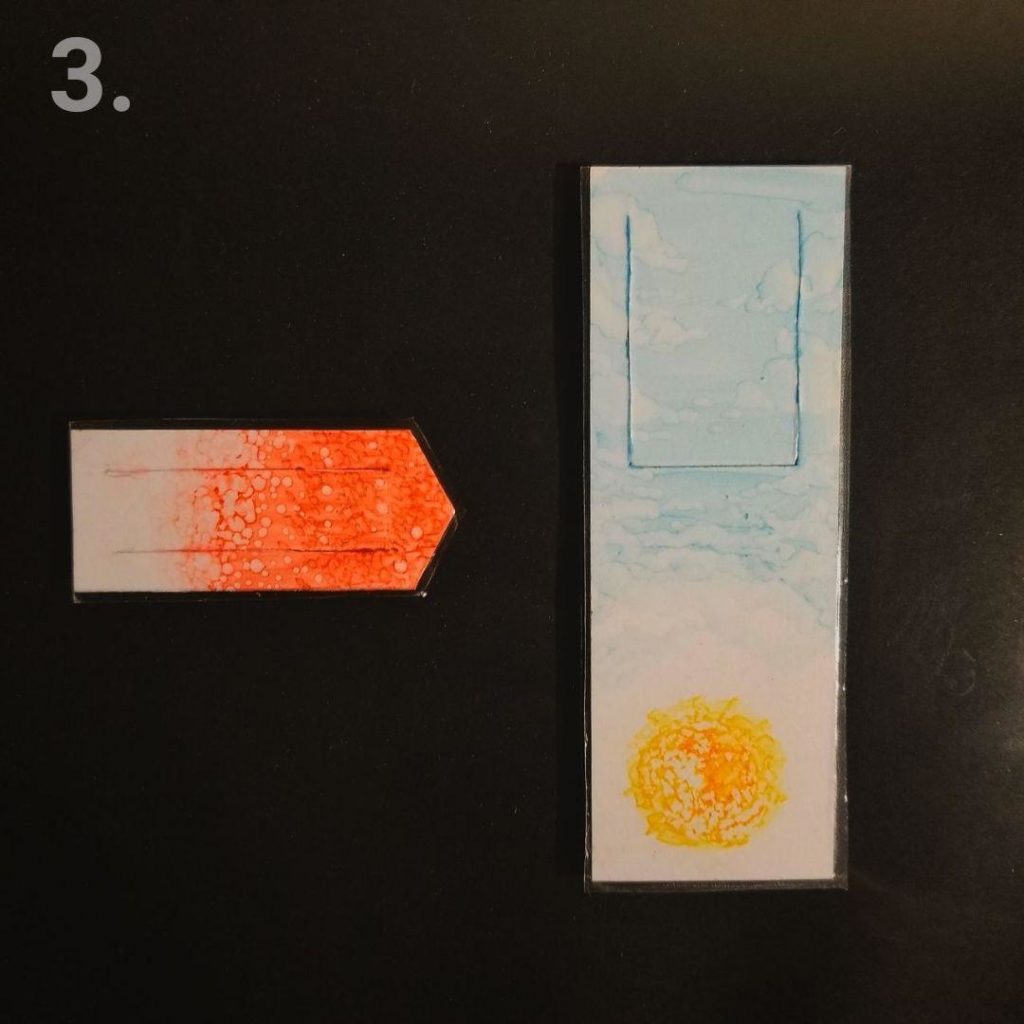
3. CUSTOMIZE THE BOOKMARK
With the supplies you gathered, customize the bookmark. Be creative and have fun with it! Keep in mind the guidelines you drew for the bookmark’s page flap and for the slits of the arrow.
As an option, you may write a memory verse.
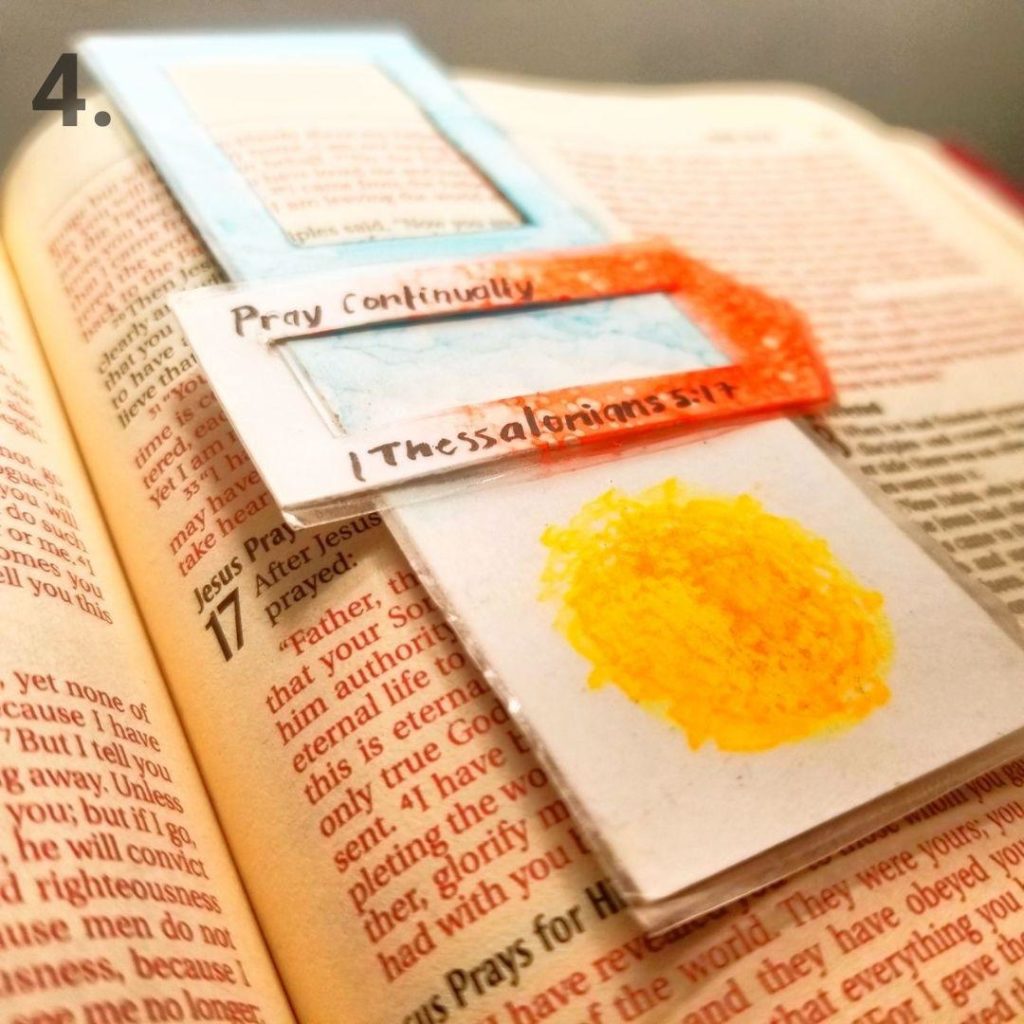
4. MAKE THE FINAL CUTS AND ASSEMBLE THE BOOKMARK
Cut along the guidelines for the flap and the slits on the arrow with your exacto-blade. After you make these cuts, you can assemble the bookmark.
Insert the bottom of the bookmark into the horizontal slits of the arrow. If you measured and cut correctly, there should be some slight traction as you move the arrow up and down the bookmark.
EXTRA NOTES
Alternatively you can make the bookmark (excluding the arrow) out of watercolor paper to increase your options for customization.
Additionally, laminating the bookmark will protect it while reinforcing its structure.